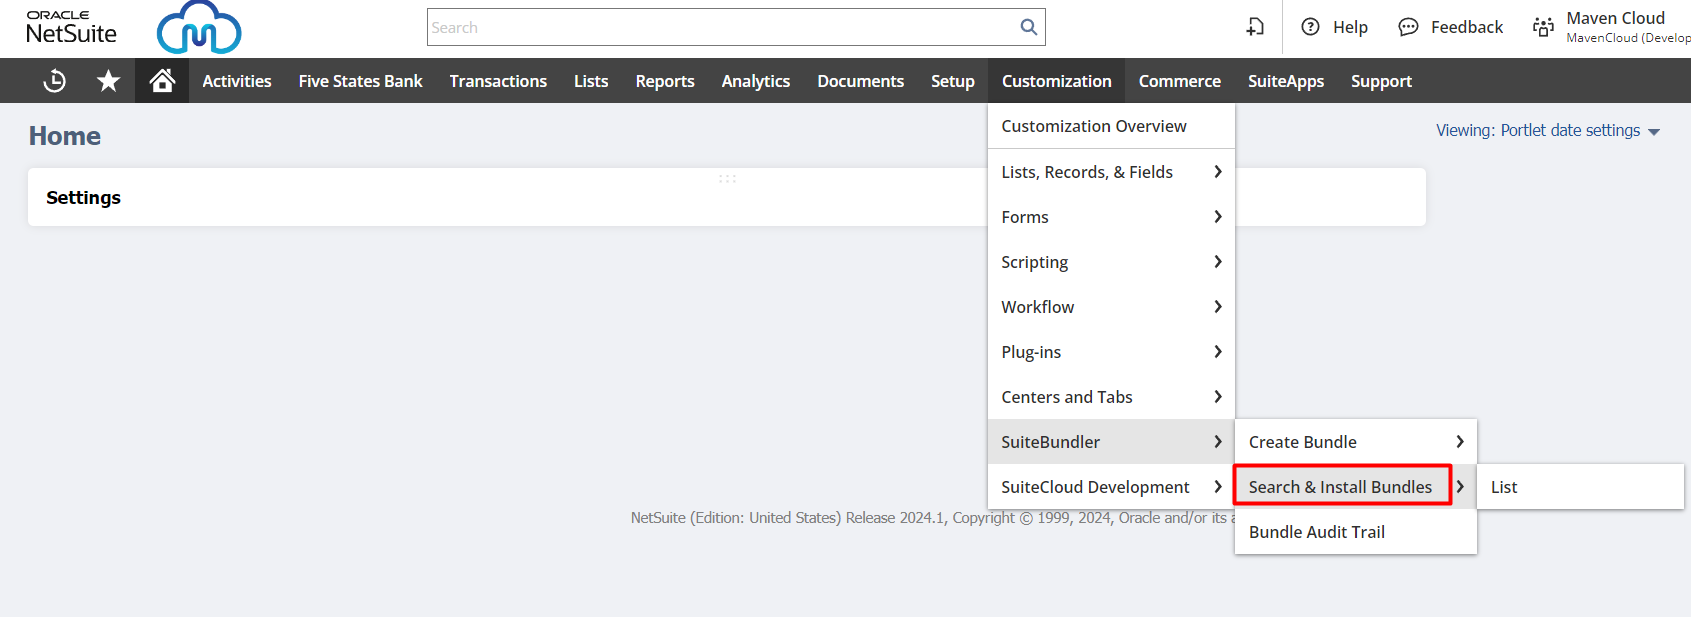
Step 2 - Installing the Bundle
- In NetSuite navigate to Customization > SuiteBundler > Search & Install Bundles
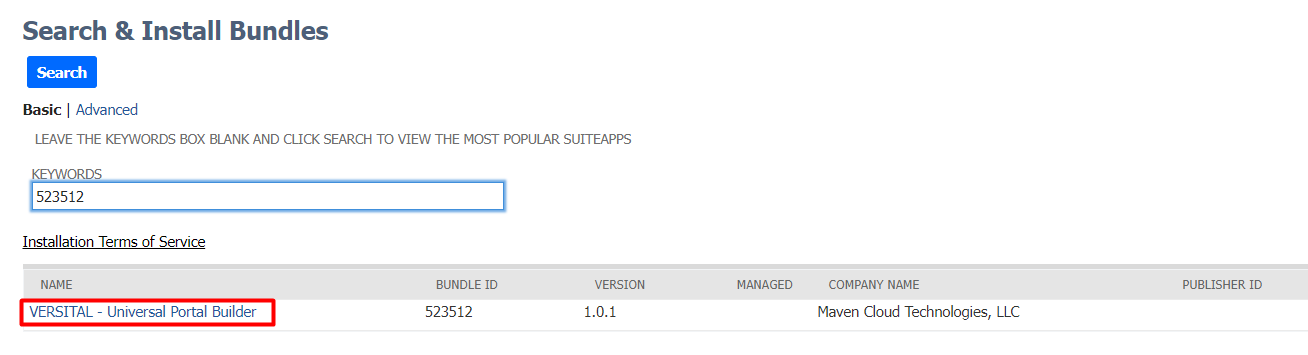
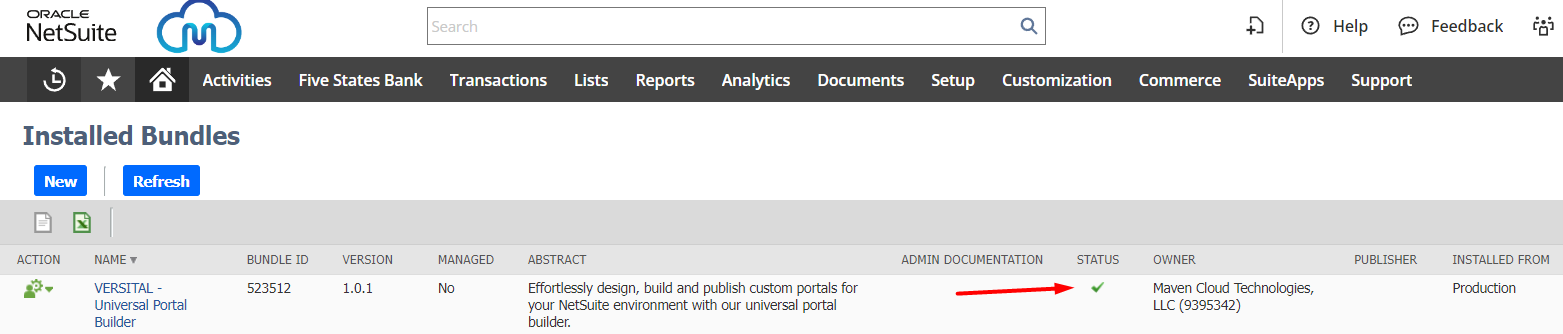
- Search for keywords "VERSITAL" or Bundle ID 523512, then click on the bundle name to begin the installation process.
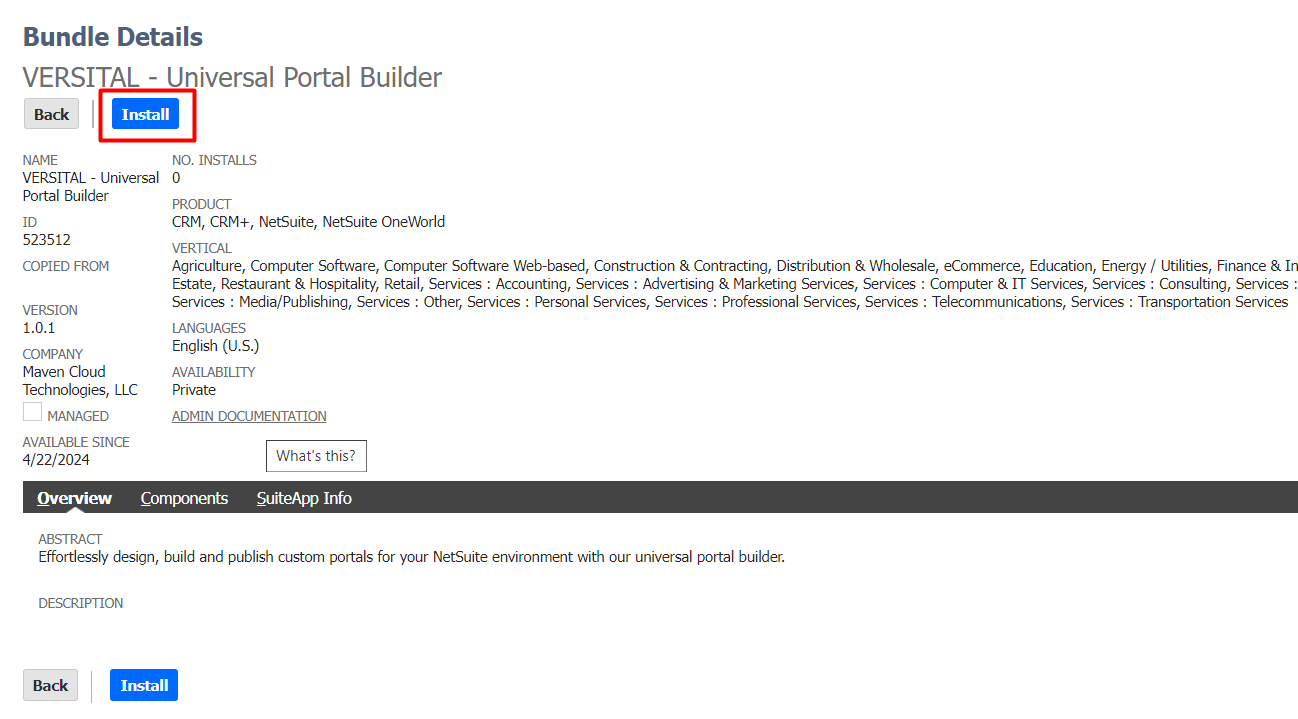
- Click Install to continue the installation process
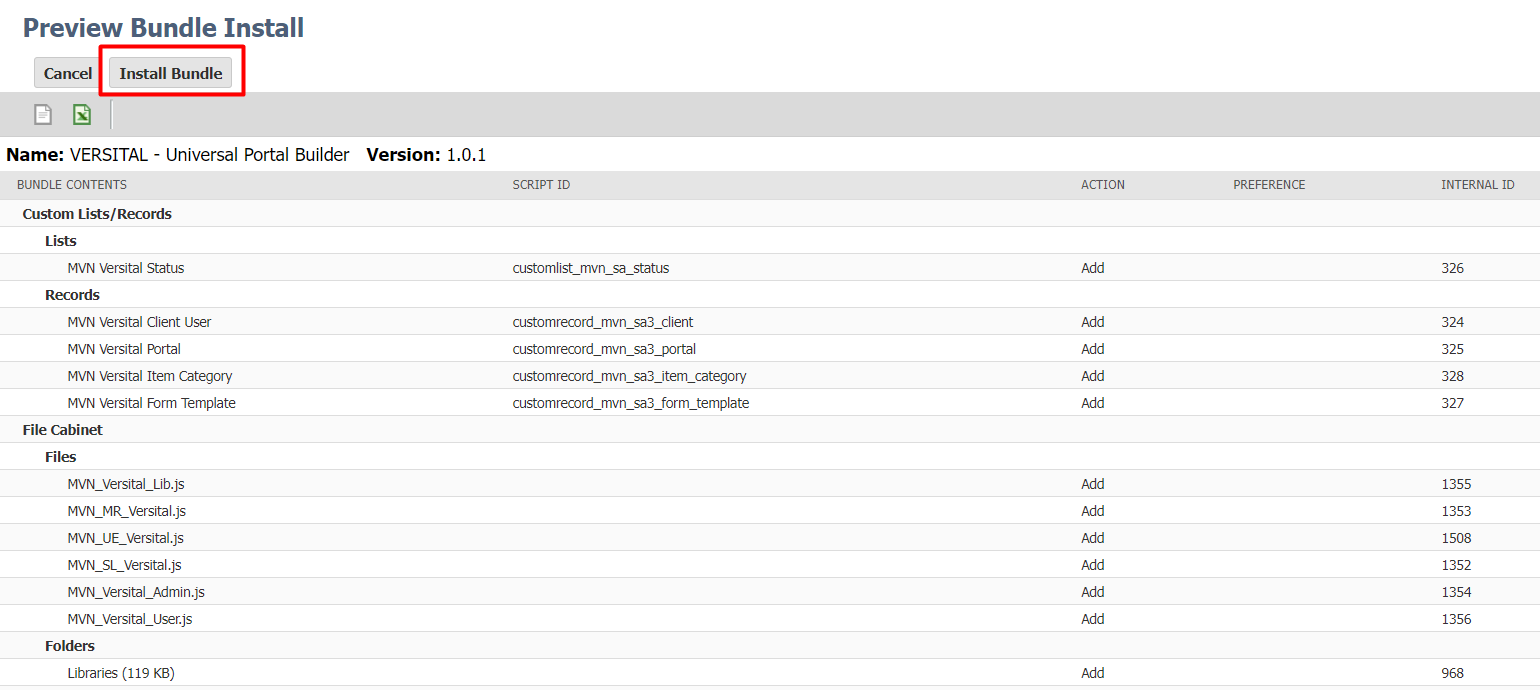
- Click Install Bundle to confirm the objects to be installed
- Once the bundle shows successfully installed this step is complete and you can move on to Step 3 - Connecting the Admin console.
Related Articles
Step 1 - Prerequisites
Welcome to VERSITAL the Universal Portal builder for NetSuite! Follow this step by step guide to a successful implementation and other detail training documentation forBefore installing VERSITAL please ensure you have the following features enabled. ...
Step 3 - Connecting the Admin Console
When creating Access Tokens be sure to note the Role used by the employee in which the Access Tokens are created. It is recommended that you create tokens for VERSITAL using the Administrator role, however, you can assign other roles to this token ...
Step 4 - Add VERSITAL Administrators
In NetSuite navigate to the Employee record that you want to give access to VERSITAL to. Then on the Access subtab click "New VERSITAL Administrator" Enter the Name and Email address for this Administrator. Mark the Status checkbox and mark "Send ...
Step 5 - User Site Settings
You have many options to customize the format of the site your users (ie. Customers, Vendors, Employees) will interact with. You can update this user site with colors, images and links that match your companies branding and web presence. This can all ...
Step 8 - Creating a Portal
When you create a portal you are creating a user interface for your VERSITAL Users to interact with your NetSuite data. The portal consists of a group of Form Templates, Records and other Custom Elements that you configure, then assign to users. ...
